

How to Create a Newsletter Popup in WordPress
The offer, the words, the timing and the setup of a newsletter popup that people actually fill in.
 WingDevs
Oct 16, 2026
6 min read
Free
WingDevs
Oct 16, 2026
6 min read
Free 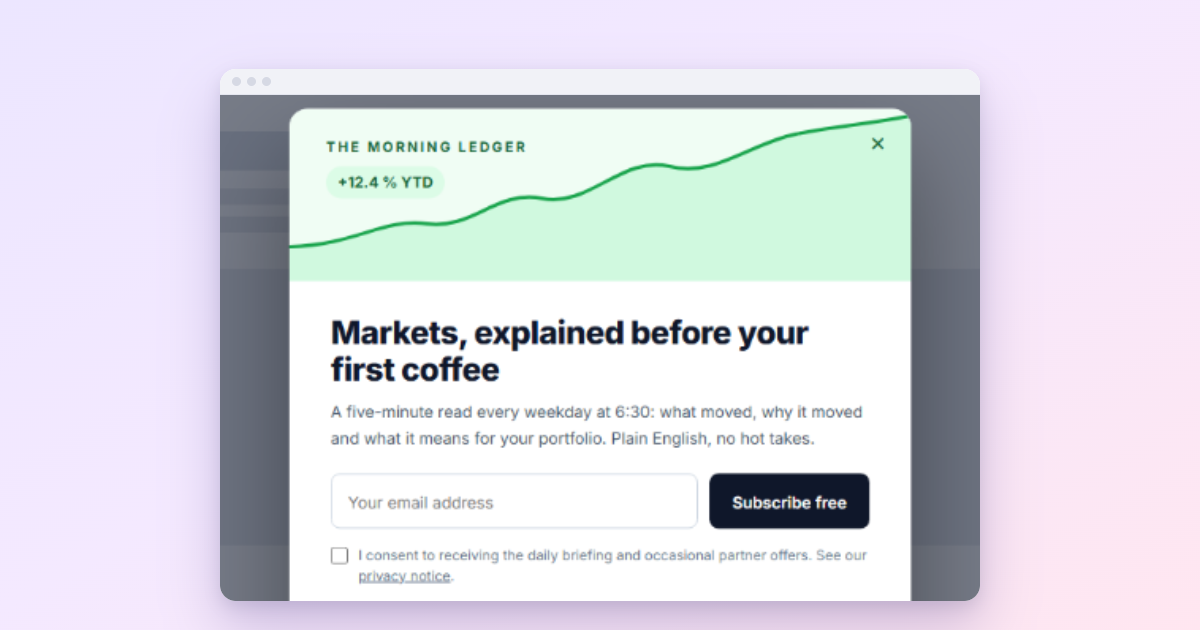
A newsletter popup that people actually fill in has a clear reason to subscribe, appears when the visitor is already interested, and has a form short enough to finish in five seconds. In WordPress it takes four steps:
- Connect your email service (Mailchimp is free in Wing Popup).
- Create a Subscribe form that asks for the email, and maybe a first name.
- Put the form in a popup and write an offer, not a request.
- Open it after some reading, and only on the pages where it fits.
Most newsletter popups fail for the same reason: they ask before they give. “Subscribe to our newsletter” appears the moment the page loads, before the visitor knows whether your content is any good, and it says nothing about what they would receive. Below we fix each of those, then set the whole thing up with the free Wing Popup plugin.
Start with the offer, not the form
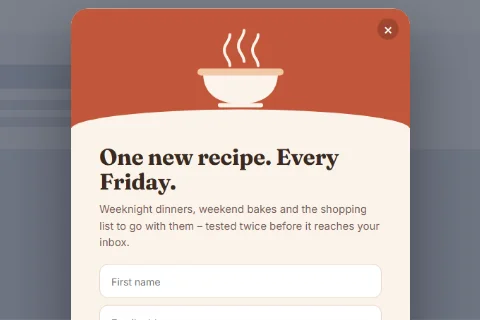
Nobody wants a newsletter. People want what is in it. So before you touch WordPress, finish this sentence: “Subscribe and you get…”
- A schedule and a topic: “One 20-minute recipe every Friday.”
- Something useful right now: “The packing checklist we use for every trip.”
- Money off: “10% off your first order.” (Ideal for shops; the code can appear the moment they subscribe.)
- Early access: “New drops 24 hours before everyone else.”
That sentence becomes your headline. If you need ideas, our list of lead magnet ideas has 21 of them with examples by industry.
Step 1: Connect your email service
Subscribers have to land somewhere. Wing Popup includes Mailchimp in the free plugin; Pro adds Brevo, Kit, MailerLite, ActiveCampaign, AWeber, HubSpot, FluentCRM and webhooks.
- In Mailchimp, create an API key: Profile → Extras → API keys → Create A Key.
- In WordPress go to Wing Popup → Forms → Integrations, paste the key into Mailchimp API Key and click Save.
- Click Sync Mailchimp Audiences. Your audiences appear underneath.
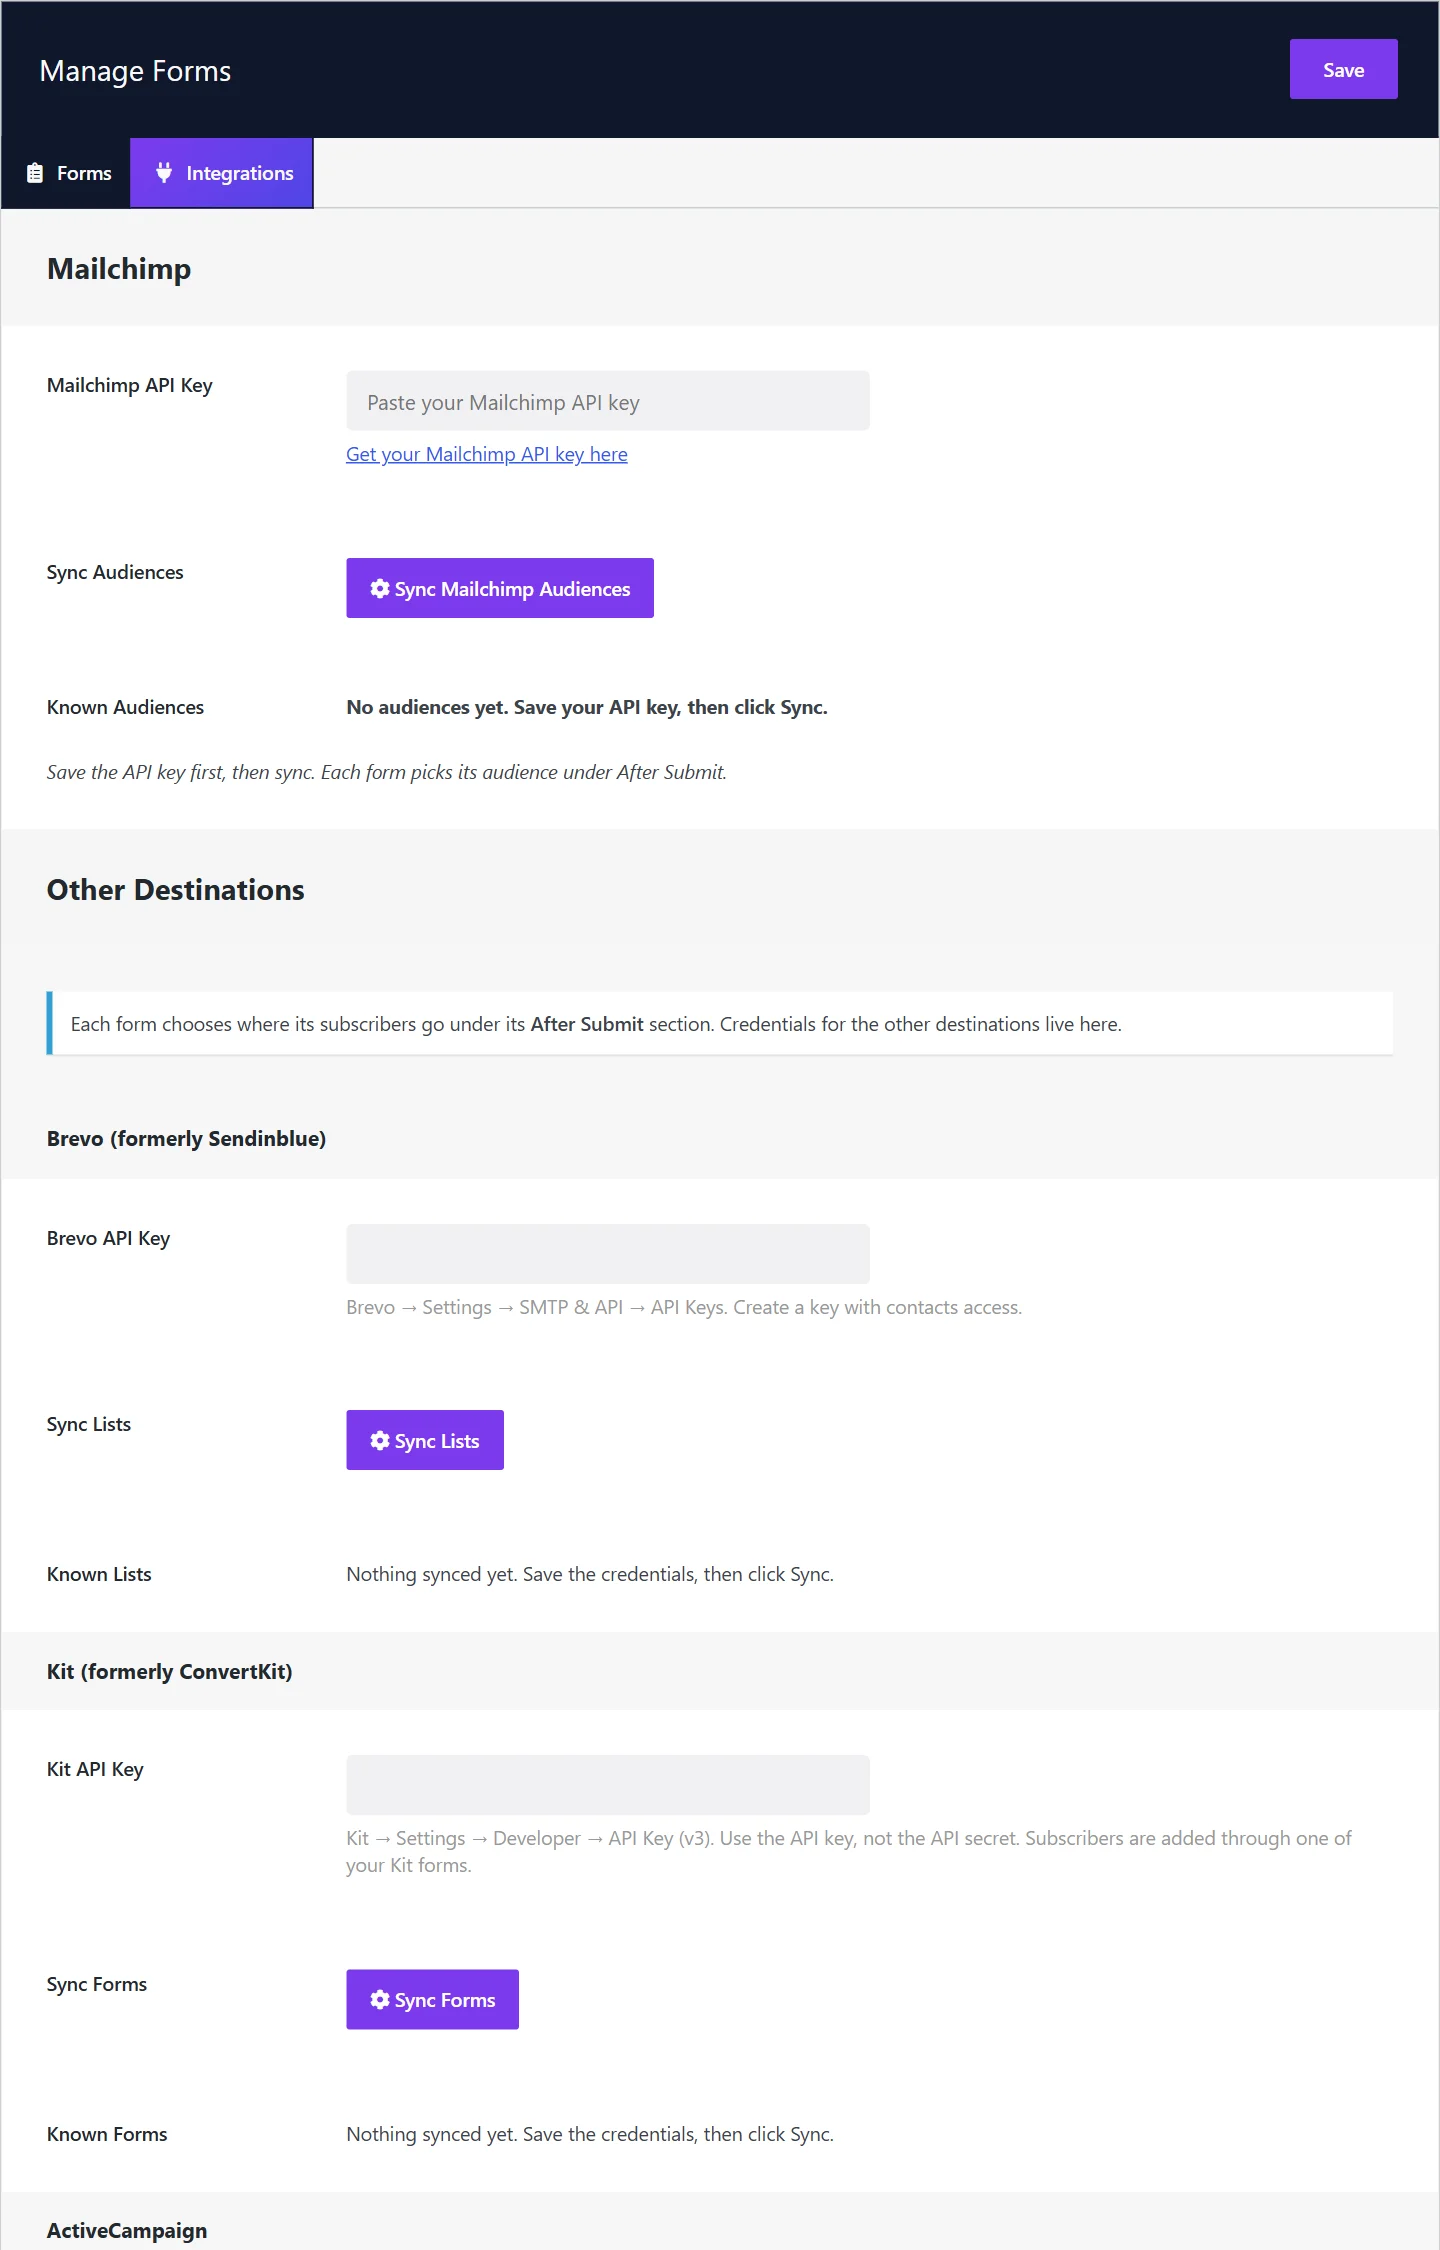
The full walkthrough, with what to do when the audience list stays empty, is in our guide to the Mailchimp popup form.
Step 2: Build a short form
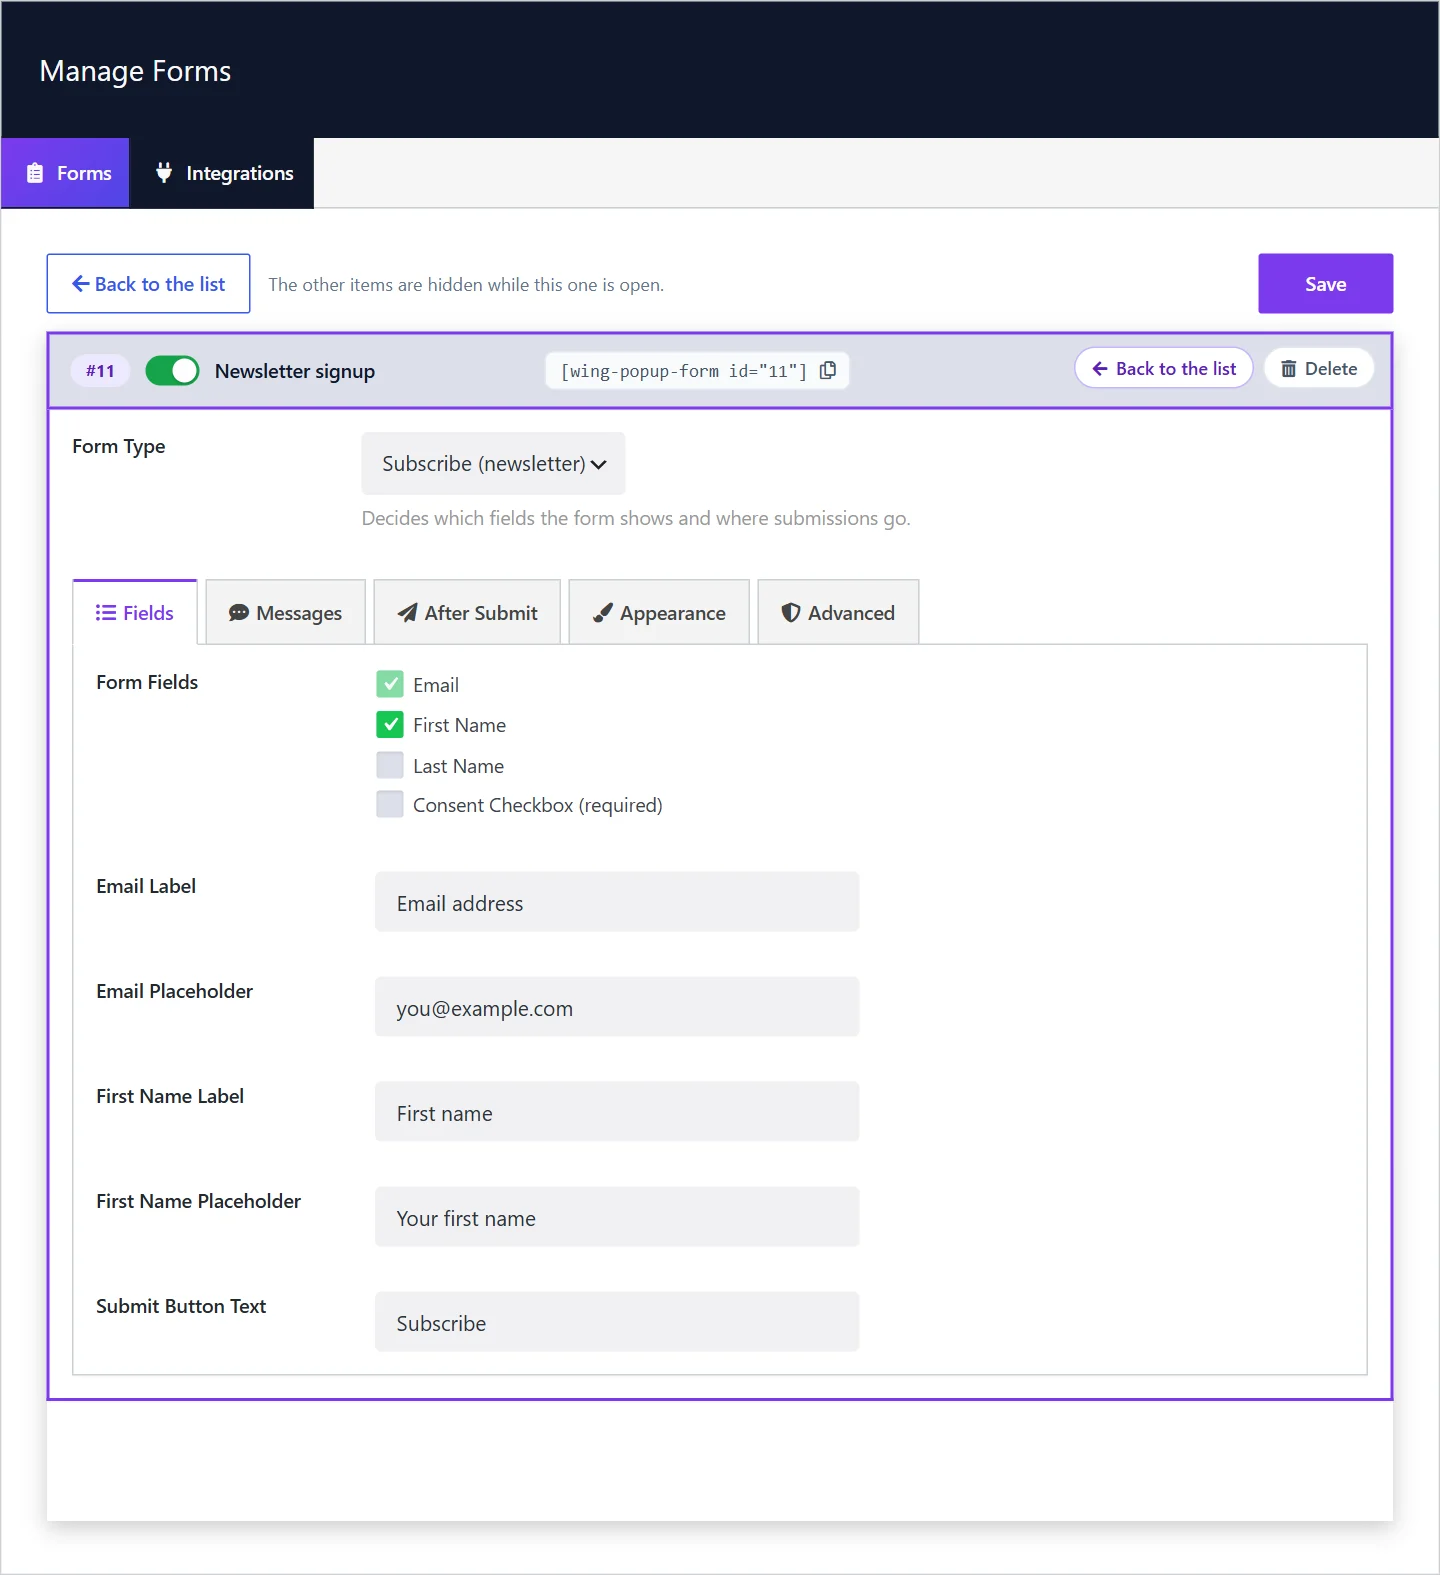
Go to Wing Popup → Forms, click Add New Form, name it and leave the Form Type on Subscribe (newsletter).
On the Fields tab, tick as little as you can get away with. Every extra field costs signups. Email alone is enough for most lists; add First Name only if your emails really use it.
Two settings worth a moment:
- Submit Button Text: write the result, not the action. “Send me the recipes” beats “Subscribe”.
- Consent Checkbox (required): if you sell in the EU, add it and say exactly what people sign up for. The signup is refused unless the box is ticked.
On the After Submit tab choose Send Subscribers To → Mailchimp and pick the Mailchimp Audience. Switch on Enable Double Opt-in to have Mailchimp confirm each address first; it keeps your list clean and is expected in several countries. Then click Save.
Step 3: Put the form in a popup
Go to Wing Popup → Popups. The quickest route is Popup Library: filter by type Form or category Lead capture, pick a newsletter design and click Insert. You can also click Add New Popup and set the Popup Type to Form.
On the Popup Content tab:
- Select the form you just built.
- Heading: the offer sentence from the first section.
- Content: one or two lines that make it concrete. “Quick weeknight dinners, tested in a real kitchen. Unsubscribe anytime.”
- Image: optional. A picture of what they will get (the dish, the checklist, the product) works better than a stock photo.
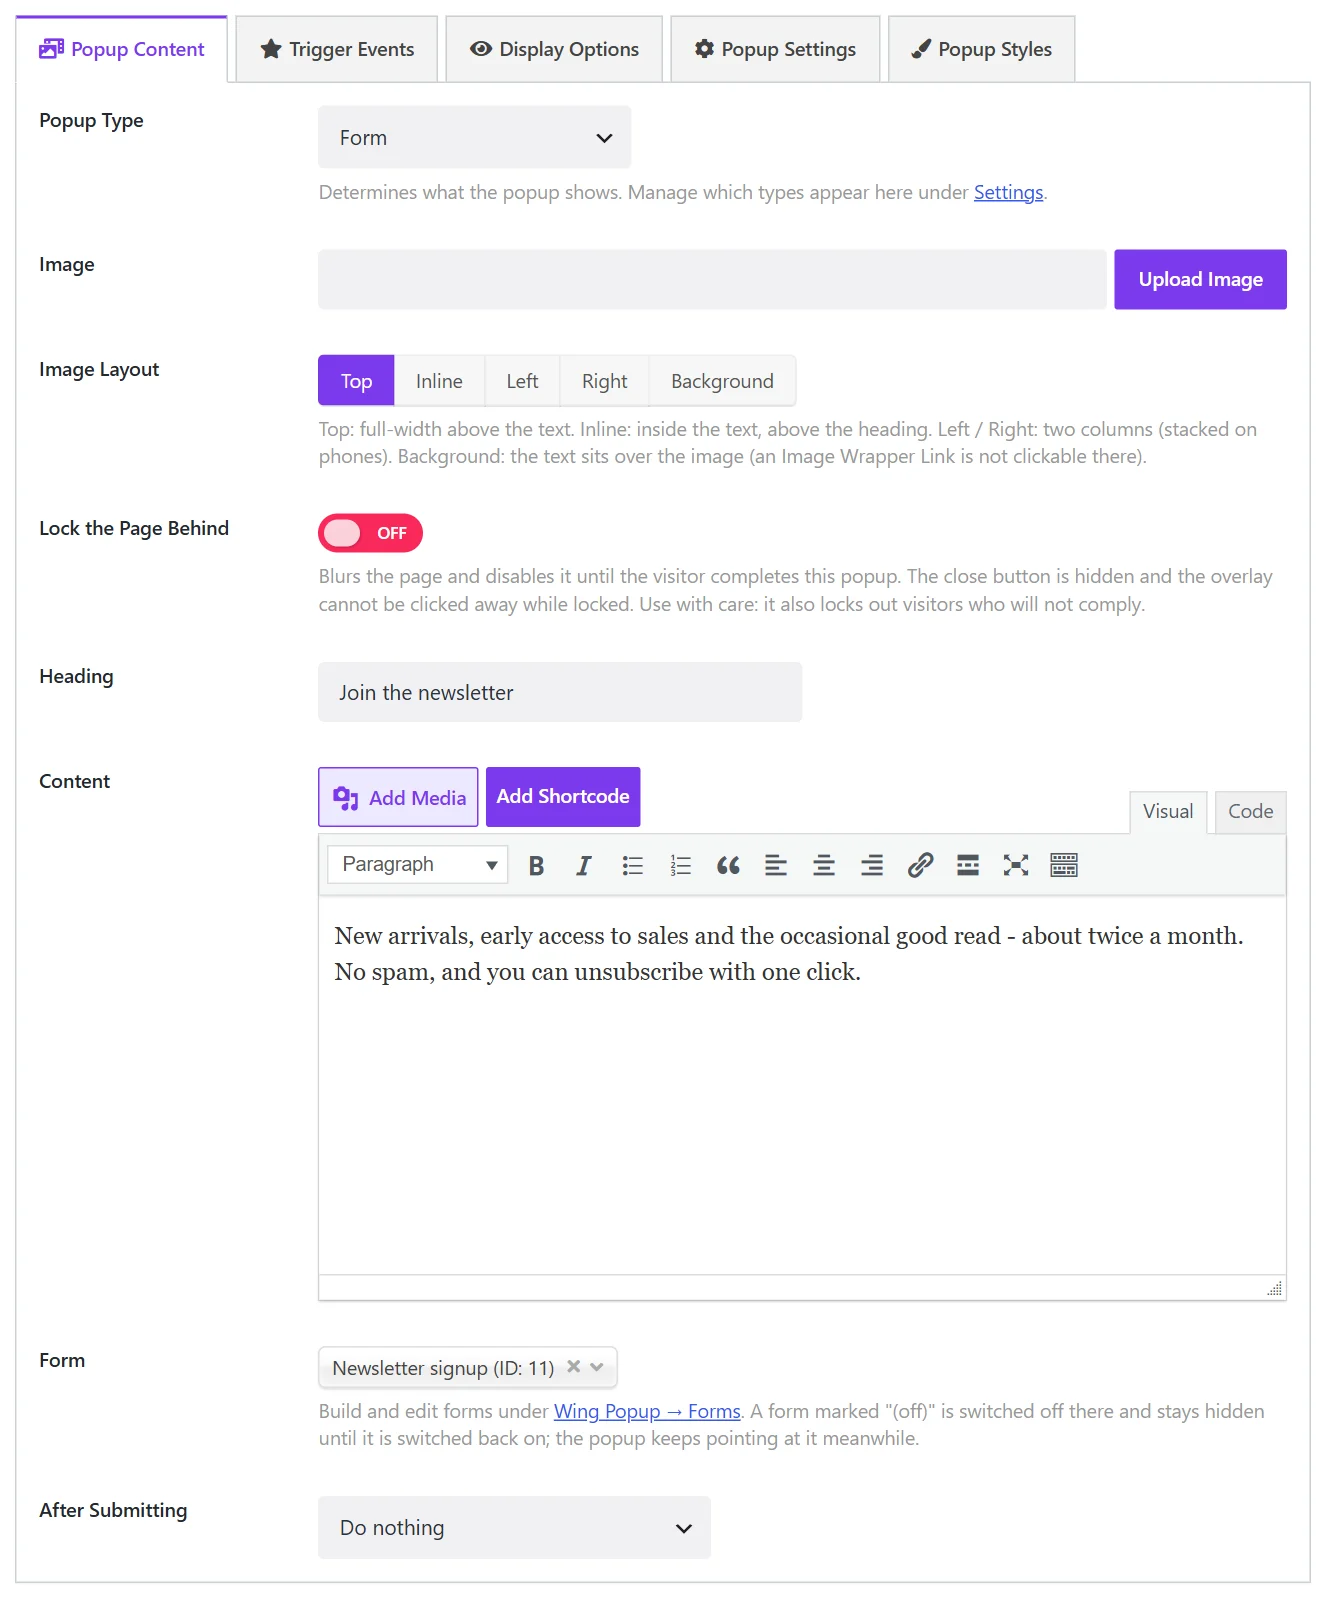
Tip: set After Submitting to Show a follow-up message and thank people in the popup itself. A shop can reveal a discount code right there with a copy button, in the free plugin. See discount coupon popups.
Step 4: Choose the right moment
The same popup converts very differently depending on when it appears. On the Trigger Events tab:
- Page Load with a delay of about 6 to 15 seconds. By then the visitor has started reading and has a reason to want more. In Omnisend’s 2025 data from 1.24 billion popup displays, a 6 to 10 second delay converted best and popups shown instantly converted worst.
- On Click, for a “Join the newsletter” button in your header or at the end of every post. These visitors asked for the form, so they convert best of all.
With Wing Popup Pro you can wait for real interest: open the popup when the reader is 50% down an article (scroll), after their third page, or when they move to leave (exit intent). See popup triggers explained.
Step 5: Limit where and how often it shows
On the Display Options tab:
- Where: switch Display the popup on the page to Custom Selection and include All Posts and Posts Page for a blog newsletter. Exclude checkout, cart and account pages for a shop.
- How often: under Frequency & Suppression use Cooldown with Don’t show again for 1 day and Don’t show again after dismissal for 30 days. Someone who said no once should not be asked again tomorrow.
Then switch the popup on, save, and test it in a private browser window. Our guide to popup frequency explains each setting.
Five mistakes that cost signups
- Opening instantly. A popup before the first sentence asks for trust you have not earned.
- “Subscribe to our newsletter.” It describes your goal, not their benefit.
- Too many fields. Name, email, company and phone is a sales form, not a newsletter.
- No easy way out. A visible close button and a “No thanks” link make the popup feel respectful, and the people who stay are the ones who mean it.
- Asking again and again. Long cooldowns after dismissal keep returning readers happy.
More rules like these are in our email popup best practices.
One thing to know if your site is cached
Many WordPress forms protect themselves with a WordPress “nonce”, a token printed into the page. On a site with page caching that token is cached with the page, and after a day or so it expires while the cached page keeps serving it. The form then refuses every signup, and nobody notices until the list stops growing.
We ran into exactly this while building Wing Popup’s forms, so visitors’ forms no longer depend on a nonce. They carry a signed token that survives about two days of caching, plus a short ticket the browser fetches when the visitor first clicks into the form. Cached pages keep working; a page cached for longer than that asks the visitor to reload instead of failing silently; and a bot that copies the page HTML still gets nothing. If you use another form plugin on a cached site, test a signup on a page that has been cached for a few days.
Frequently asked questions
Where do the subscribers go?
Into the email service you connect. The free plugin sends them to a Mailchimp audience; Wing Popup Pro adds Brevo, Kit, MailerLite, ActiveCampaign, AWeber, HubSpot, FluentCRM and webhooks.
Can I show the same signup form in a page as well?
Yes. Every form has a shortcode and a block, so the newsletter form can sit in your footer or at the end of each post and in a popup at the same time.
Should I use double opt-in?
Usually yes. It proves the address belongs to the person who typed it, keeps typos and fake addresses off your list, and is expected in several countries. New subscribers appear in Mailchimp only after they confirm.
How do I stop spam signups?
You do not need to do anything: every Wing Popup form has built-in protection (a hidden trap field, signed tokens, timing and attempt limits). For sites under heavy attack you can add an ALTCHA or Cloudflare Turnstile challenge under Settings.
We make Wing Popup and Wing Suite and test every step in these guides on a real WordPress site before publishing.