

How to Add a Mailchimp Popup Form to WordPress
Connect Mailchimp to a WordPress popup without embed code: pick your audience, design, publish.
 Wahiduz Zaman
Oct 18, 2026
4 min read
Free
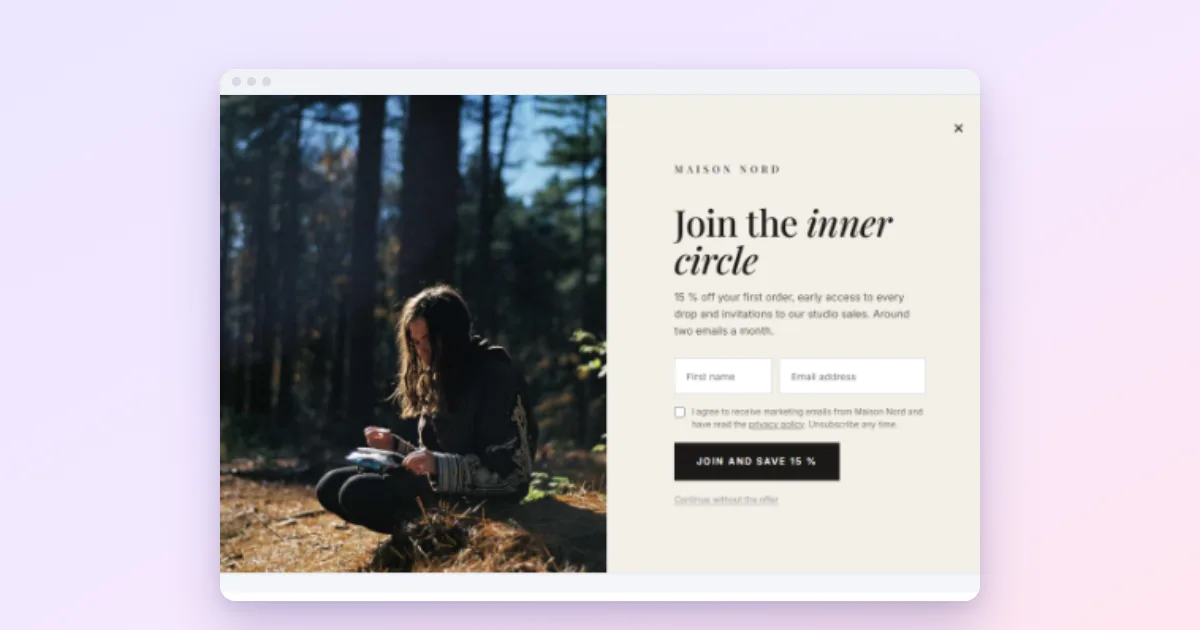
You do not need Mailchimp’s embed code. Connect your Mailchimp account to a WordPress popup plugin once, and every popup form can send subscribers straight to the audience you choose:
- Create a Mailchimp API key.
- Paste it into Wing Popup → Forms → Integrations and sync your audiences.
- Create a Subscribe form and pick the audience.
- Show the form in a popup, choose the trigger and the pages, switch it on.
Mailchimp has its own popup form, and WordPress.com and Mailchimp both explain how to paste its code into a site. It works, but you design the popup in Mailchimp, the targeting is basic, and the code has to be pasted into your theme. Connecting Mailchimp to a WordPress popup plugin keeps everything in your dashboard: the design, the pages, the timing, the frequency, and as many different forms and audiences as you like.
The steps below use the free Wing Popup plugin, which we make; its Mailchimp integration costs nothing.
Step 1: Create a Mailchimp API key
- Log in to Mailchimp and open your Profile (the avatar in the corner).
- Go to Extras → API keys.
- Click Create A Key, give it a name such as “My website popups” and copy it.
Treat the key like a password: anyone who has it can read and change your lists. That is why Wing Popup talks to Mailchimp only from your server. The key stays in your WordPress database and never appears in the page a visitor downloads, which is not true of every “paste your key here” script you will find online.
Step 2: Connect Mailchimp to WordPress
- Install and activate Wing Popup from Plugins → Add New Plugin.
- Go to Wing Popup → Forms and open the Integrations section.
- Paste the key into Mailchimp API Key and click Save.
- Click Sync Mailchimp Audiences. Your audiences appear under Known Audiences.
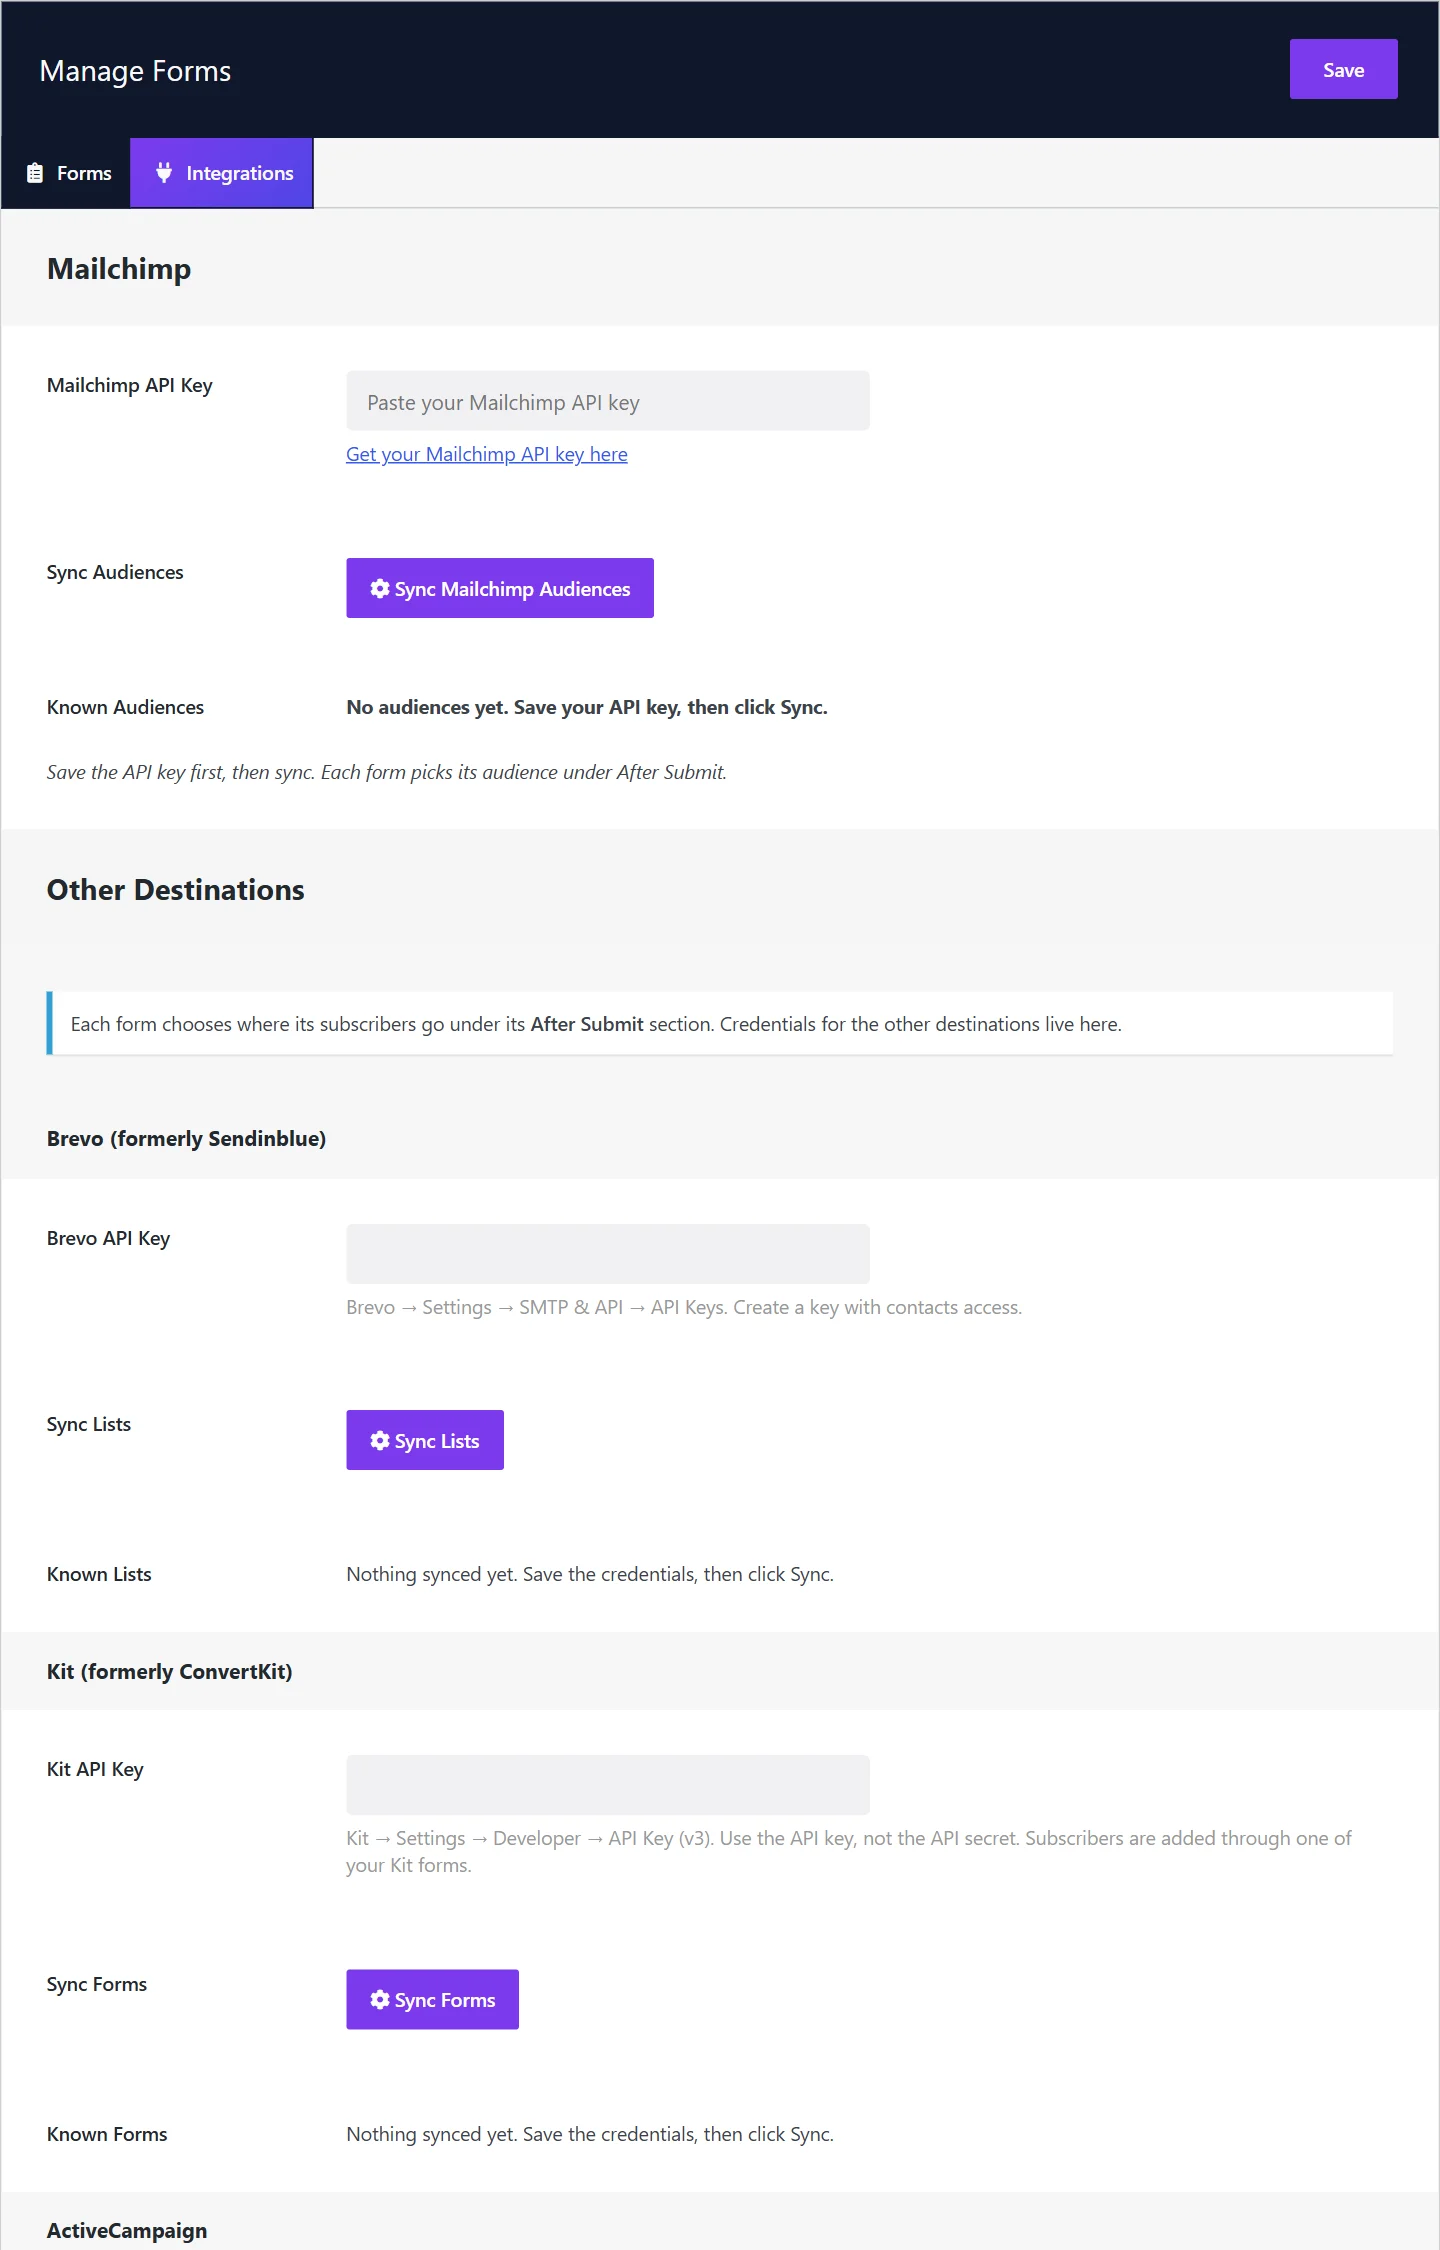
Sync again whenever you add an audience in Mailchimp.
No Forms menu? Switch on Enable Forms under Wing Popup → Settings → General.
Step 3: Create the signup form
- Go to Wing Popup → Forms and click Add New Form.
- Click the name in the title bar and call it something you will recognise, for example “Newsletter, blog”.
- Leave Form Type on Subscribe (newsletter).
- On Fields, tick Email and, if you use it in your emails, First Name. Write the button text.
- On After Submit, set Send Subscribers To to Mailchimp and choose the Mailchimp Audience.
- Click Save.
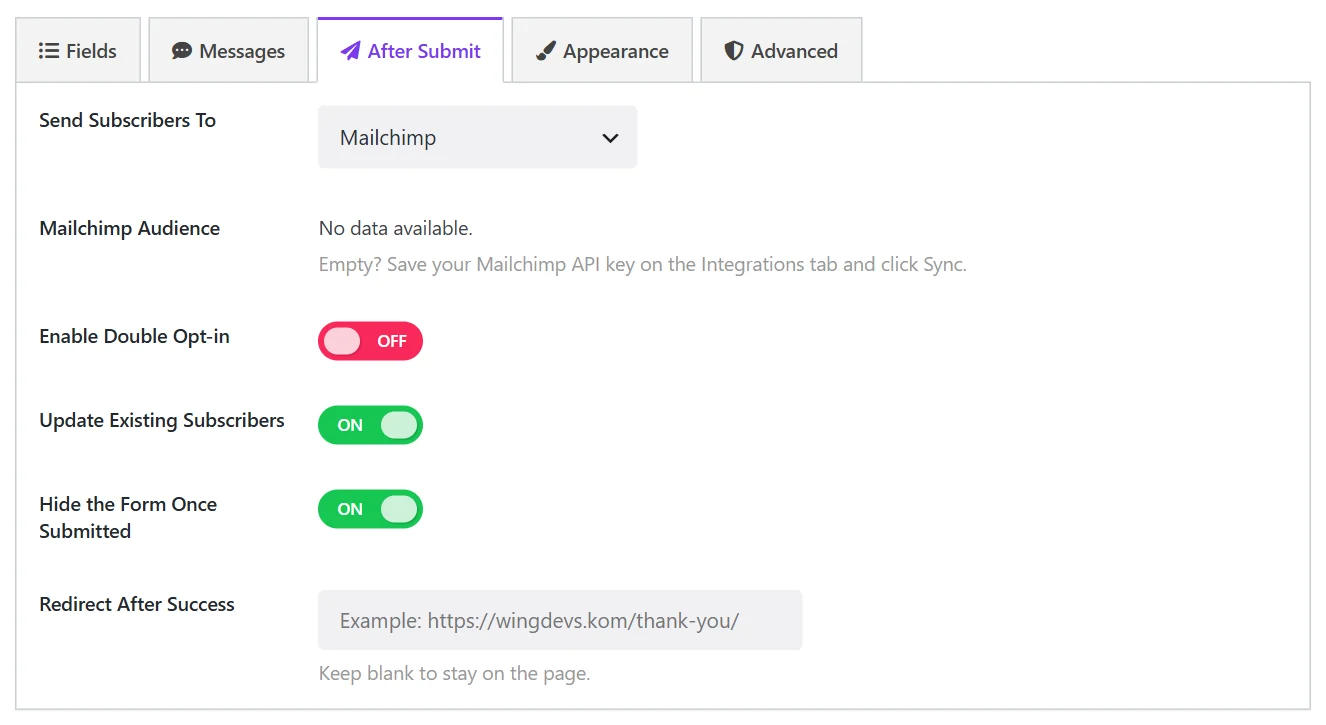
Three switches on the same tab are worth knowing:
- Enable Double Opt-in: Mailchimp emails a confirmation link first; the person joins your audience only after clicking it.
- Update Existing Subscribers: when someone who is already on the list signs up again, their details are updated instead of the form reporting an error.
- Hide the Form Once Submitted and Redirect After Success: show the thank-you text in place of the form, or send people to a thank-you page.
Step 4: Show the form in a popup
Go to Wing Popup → Popups and open the Popup Library. Pick any design with a signup form and click Insert, or click Add New Popup and choose the Form type. On the Popup Content tab, select your new form and write the headline.
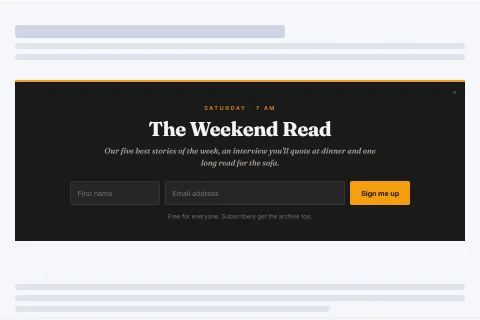
Then set the basics:
- Trigger Events: Page Load after about 6 to 15 seconds, or On Click from a “Subscribe” button.
- Display Options: the pages it belongs on, and a cooldown so the same visitor is not asked every visit.
Switch the popup on, save, and sign up yourself from a private browser window. With double opt-in on, check your inbox for Mailchimp’s confirmation and click it; you then appear in the audience.
One site, several audiences
Because the audience belongs to the form, not to the site, you can run different signups side by side: a general newsletter on the blog, a “notify me” list on a product page, a webinar list on a landing page. Create one form per audience and one popup per form.
The same form can also sit inside a page. Every form has a shortcode () and a Wing Popup Form block, so the signup can appear in your footer and in a popup at once.
If subscribers do not appear in Mailchimp
- The audience menu says “No data available”. The key was not saved or not synced. Save it, then click Sync Mailchimp Audiences.
- The signup works but nobody shows up. With double opt-in, people appear only after confirming. Look for the confirmation email, including in spam.
- The form says it failed. The address may already be on the list (switch on Update Existing Subscribers), or Mailchimp refused it, for example because that person unsubscribed before. Mailchimp also rejects addresses it considers fake, such as
[email protected], so test with a real inbox. - The popup does not open at all. Check that it is switched on, that the page is included, and test in a private window: frequency rules remember that you already saw it.
Frequently asked questions
Is the Mailchimp integration free?
Yes. Mailchimp is part of the free Wing Popup plugin, with no limit on forms, popups or subscribers. Mailchimp’s own plan limits still apply to your audience.
Can I add tags or ask for a name?
The form can ask for first and last name, which are sent to Mailchimp’s name fields. Tags and groups are best set up as an automation in Mailchimp, for example “tag everyone who joined through this signup form”.
What about GDPR?
Add the consent checkbox to the form and say what people sign up for, link your privacy policy in the popup, and use double opt-in. That covers the usual requirements; your own legal situation may need more.