

How to Put a Contact Form in a Popup in WordPress
A contact form that opens from any button or menu link, with spam protection and email notifications built in.
 Wahiduz Zaman
Oct 22, 2026
4 min read
Free
Build a contact form once, then show it in a popup that opens from a button. With the free Wing Popup plugin:
- Go to Wing Popup → Forms, add a form and set its type to Contact form.
- Choose the fields and where the notification email goes.
- Create a popup of the Form type and select the form.
- Set the trigger to On Click with your button’s CSS class.
A contact form in a popup saves visitors a trip to the contact page. They click “Ask a question” on a product, a service or a pricing table, write their message, and stay exactly where they were. For the site owner, it means questions arrive with the context still fresh: you know which page they were on when they asked.
Below we build one from scratch with Wing Popup, our plugin, which has a contact form type, email notifications and spam protection in the free version.
Step 1: Build the contact form
- Go to Wing Popup → Forms and click Add New Form.
- Name it, for example “Contact popup”.
- Set Form Type to Contact form.
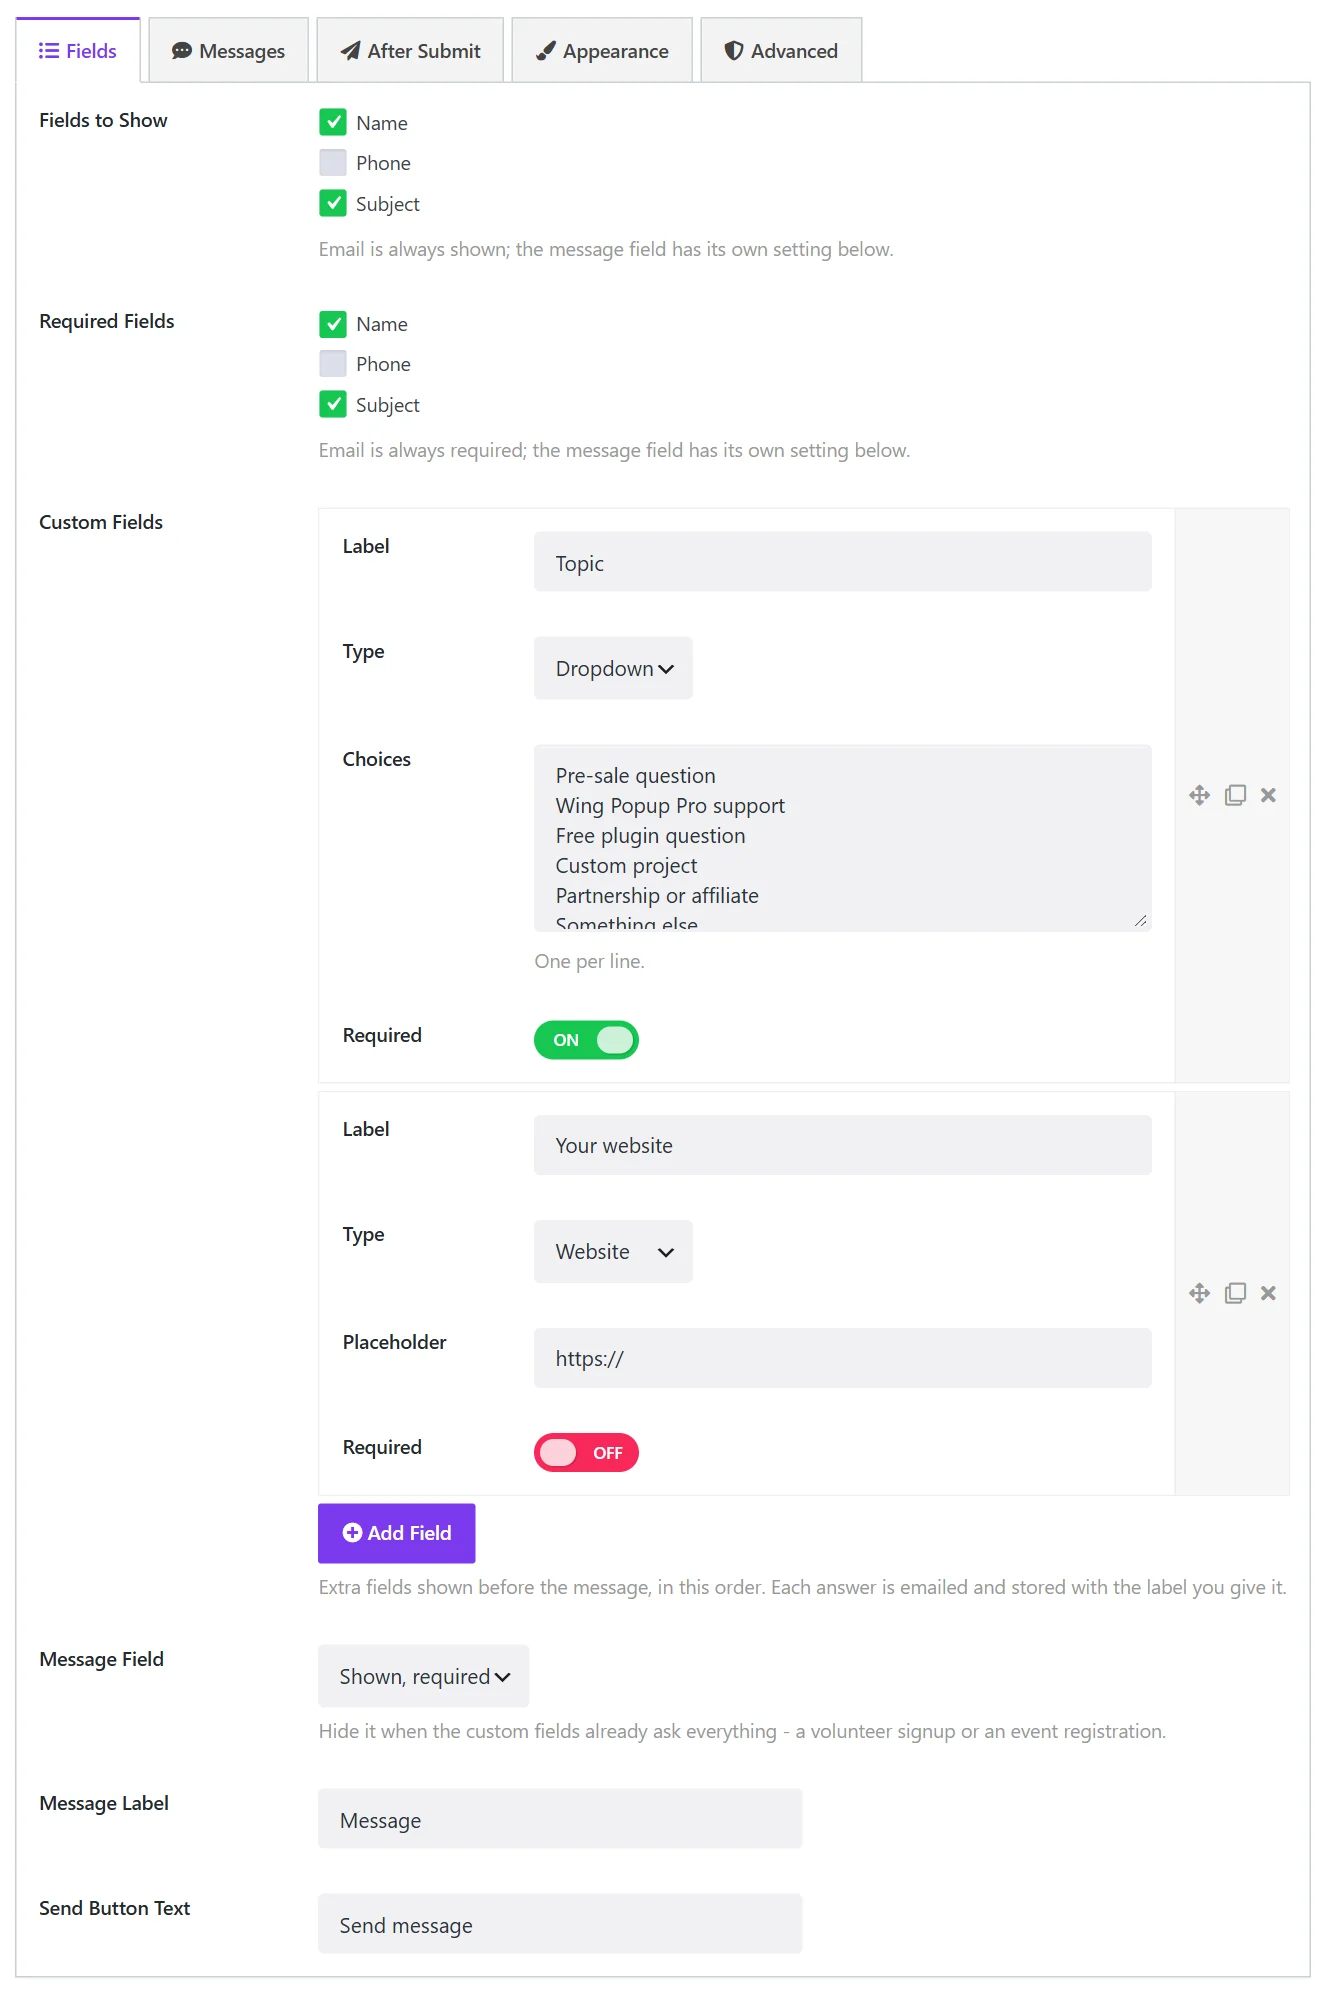
On the Fields tab choose what to ask:
- Fields to Show: Name, Phone, Subject. Email is always shown.
- Required Fields: which of those must be filled in.
- Message Field: shown and required (the default), shown and optional, or hidden. Hide it for a callback request, where name and phone say it all.
- Send Button Text: “Send message” by default. “Ask my question” or “Request a callback” can work better.
Step 2: Decide where messages go
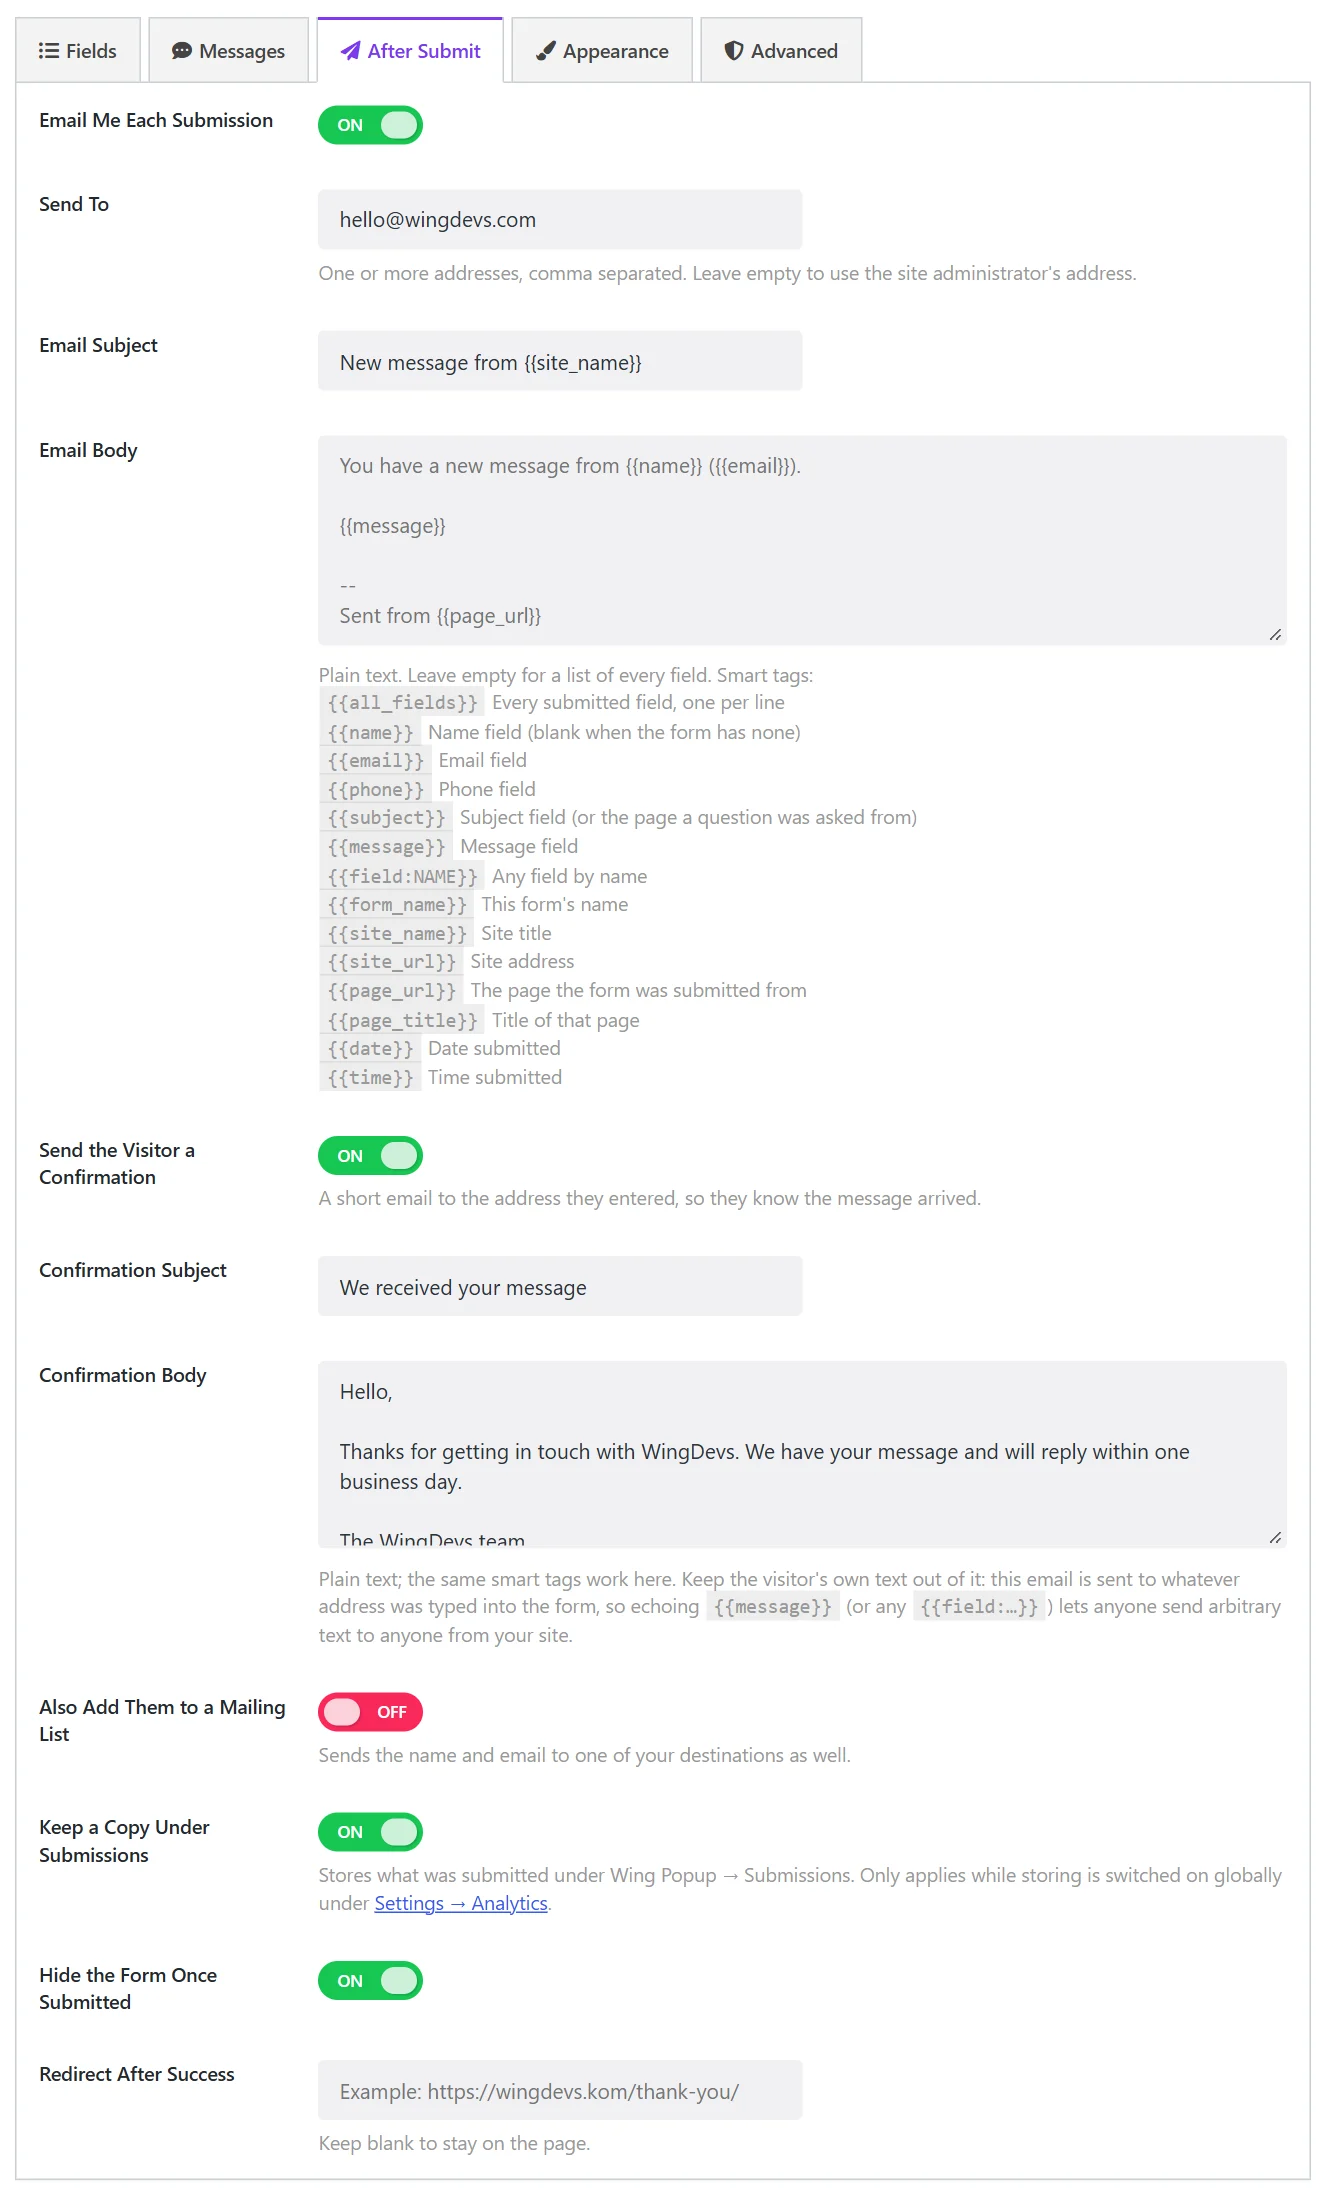
On the After Submit tab, Email Me Each Submission sends you every message:
- Send To: one or more addresses, separated by commas. Empty uses the site admin’s address.
- Email Subject: “New message from {{site_name}}” by default.
- Email Body: plain text with smart tags such as
{{name}},{{email}},{{message}}and{{page_url}}. Leave it empty to receive a list of every field.
The reply address of the notification is the visitor’s email, so you can answer with Reply. Including {{page_url}} tells you which page the question came from, which is half the answer for a pre-sales question.
Optional extras on the same tab:
- Send the Visitor a Confirmation: a short receipt to the sender. Keep it a fixed message of yours and do not repeat the visitor’s own text in it: otherwise anyone can type a stranger’s address and a spam message, and your site will deliver it for them.
- Also Add Them to a Mailing List: with a consent checkbox, people who tick it join your Mailchimp audience too.
Step 3: Put the form in a popup
- Go to Wing Popup → Popups and click Add New Popup, or pick a contact design from the Popup Library.
- Set the Popup Type to Form and select your contact form.
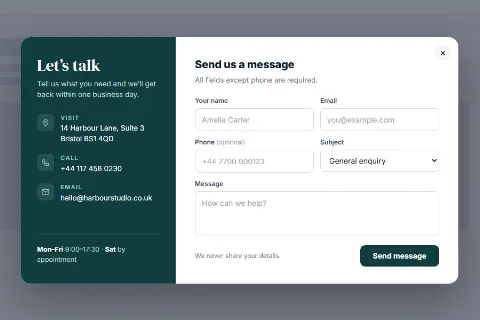
- Write a short heading (“Questions? Ask us.”) and one line of reassurance (“We reply within one business day.”).
Step 4: Open it from a button
A contact popup should open when someone asks for it, not on its own.
- Give your button or menu item a CSS class, for example
open-contact. - On the popup’s Trigger Events tab switch on Display Popup on Click and enter
.open-contact. - Switch Display Popup on Page Load off.
- On Display Options, set Frequency Mode to Always, so the button works every time.
Step-by-step help for each builder is in our guide to popups on button click.
Spam protection is already on
Every Wing Popup form is protected the moment you create it: a hidden trap field for bots, a signed token that also works on cached pages, a check that someone actually used the form, a minimum time to submit, and limits on repeated attempts. Messages containing words from your WordPress Disallowed Comment Keys list, or too many links, are refused too.
A bot that falls into the trap field is shown the normal success message. That is deliberate: a bot that is told it failed simply tries again with a different trick, while one that believes it succeeded moves on.
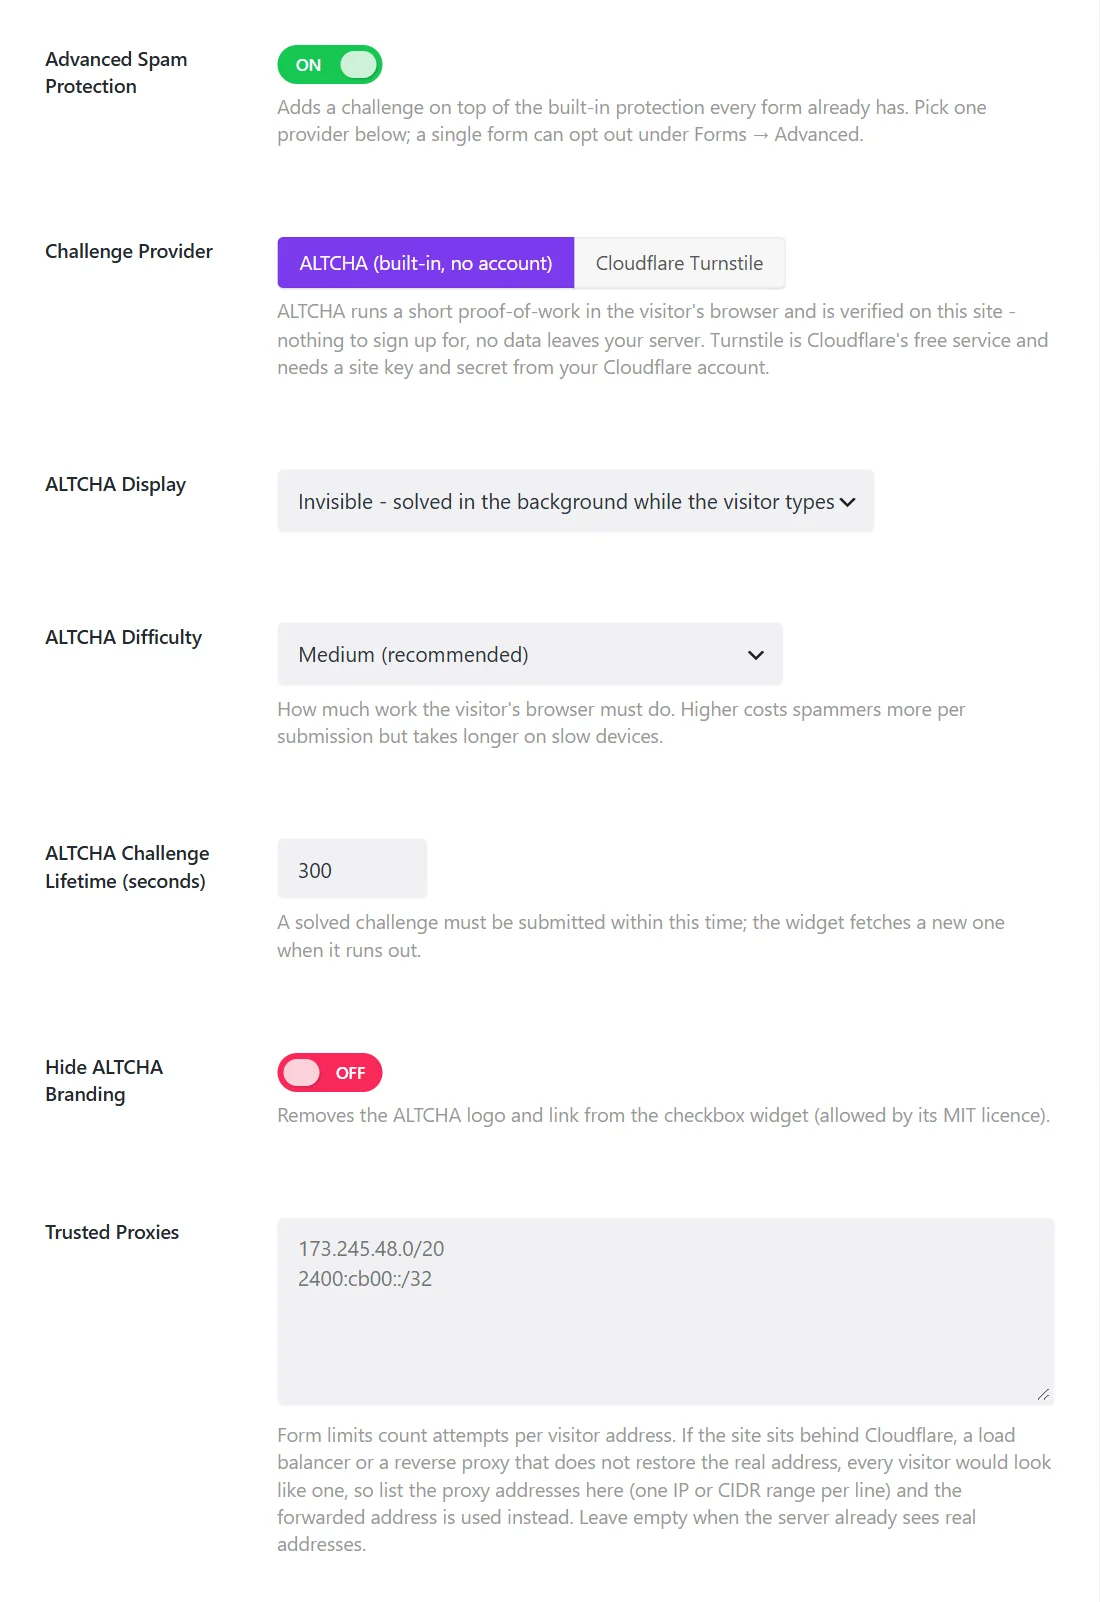
For sites under heavy attack, Settings → General → Spam Protection adds a challenge: ALTCHA, which runs on your own site with no account, or Cloudflare Turnstile.
If notification emails do not arrive
The form hands each email to WordPress, which sends it through your web host. Many hosts deliver such mail unreliably or not at all. If messages go missing, the dependable fix is an SMTP plugin (such as FluentSMTP or WP Mail SMTP) connected to a real mail service. It takes a few minutes and fixes every email your site sends, not just this form. When WordPress refuses to send, Wing Popup shows administrators a notice with the reason.
Two details of how we send are worth knowing. The notification to you is sent before the visitor sees “Thank you”, so if it fails the visitor is told to try again rather than wrongly reassured. The confirmation to the visitor and any mailing-list signup happen after the answer has gone back to the browser, so the visitor never waits for them. And when you test the form while logged in as an administrator, a failed notification shows you the actual reason; visitors only ever see a general message.
Wing Popup Pro adds custom fields of your own (choices, checkboxes, dates), a pre-sale question form, and Submissions: a copy of every message kept in WordPress, searchable and exportable, so nothing is lost if an email goes astray.
Frequently asked questions
Can I use Contact Form 7 or WPForms instead?
You can place another plugin’s shortcode inside a popup’s content, but Wing Popup’s own contact form needs no second plugin and has spam protection and caching support built in.
Can the same form appear on my contact page too?
Yes. Every form has a shortcode and a block, so one form can live on the contact page and in a popup.