

How to Lock Content Behind an Email Form in WordPress
When gating a recipe, report or lesson is worth it, how to keep it SEO-safe, and the setup.
 Wahiduz Zaman
Oct 23, 2026
4 min read
Free
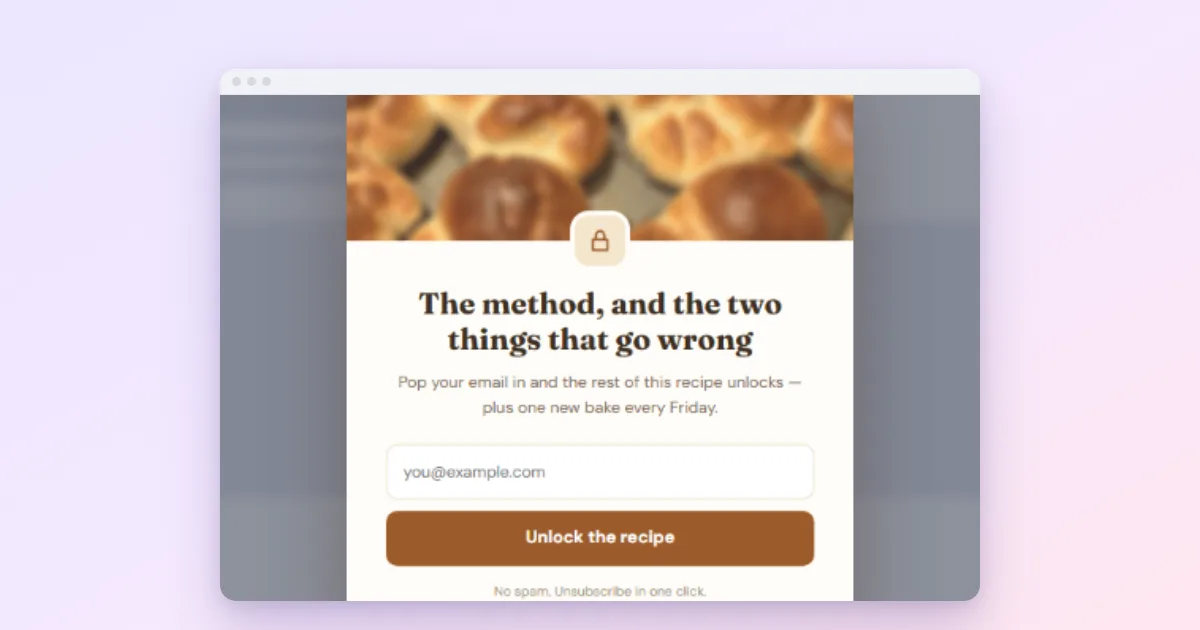
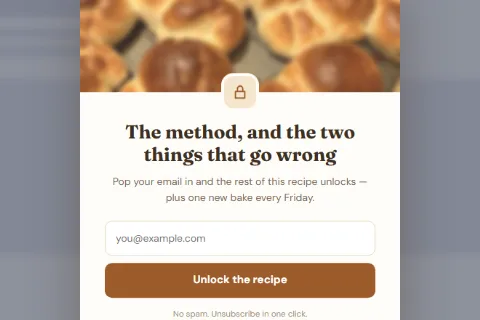
A content locker blurs a page until the visitor completes a form, usually an email signup. Use it only where the content is clearly worth an email, and keep the full text in the page so search engines can still read it. In Wing Popup (free):
- Create a Subscribe form and a Form popup that uses it.
- Switch on Lock the Page Behind on the Popup Content tab.
- Limit the popup to the pages you want to gate.
- Set frequency so subscribers are not asked again.
Gating content is the strongest way to turn a reader into a subscriber, and the easiest way to lose one. A recipe, a detailed report or a lesson that people actively search for can be worth an email address. A normal blog post almost never is. So before the setup, a word on when locking is worth it and how to keep it fair to search engines.
When content locking works
The exchange has to feel fair. Lock content when:
- The content is clearly above average: a full template, a research report, a premium recipe collection, a course lesson.
- The visitor already knows what they will get, because the first part of the page shows it.
- You will follow up with more of the same, so the email list is a continuation, not a trap.
Do not lock your main traffic pages, your product pages, or anything people need to make a purchase decision.
Keep it SEO-safe
Search engines judge what they can read. Two rules keep a locked page in good standing:
- Keep the full content in the page. A popup locker blurs the page in the browser; the text itself is still in the HTML, so Google can read and rank it.
- Tell Google the page is gated. Showing search engines content that visitors cannot see is what Google calls cloaking. Its answer for gated pages is paywalled content markup:
isAccessibleForFree: falseplus acssSelectorfor the locked part, which “helps Google differentiate paywalled content from the practice of cloaking”. For pages you lock permanently, it is worth adding through your SEO plugin or a few lines of JSON-LD.
Google’s guidance on intrusive interstitials applies here too: a page that is unusable on mobile as soon as someone arrives from search can rank lower. Lock only a few pages, and see are popups bad for SEO for the full picture.
Step 1: Build the gate
- Create a Subscribe form under Wing Popup → Forms and connect it to your email list. Our newsletter popup guide walks through it.
- Go to Wing Popup → Popups. From the Popup Library, insert a locker design (search for “locker”), or add a new popup of the Form type.
- Select your form on the Popup Content tab.
- Switch on Lock the Page Behind.

While locked, the page behind is blurred and does not react to clicks or the keyboard, the close button is hidden, and clicking outside or pressing Escape does nothing. A successful signup unlocks the page.
The worst thing a locker can do is leave a visitor with a blurred page and nothing on top of it, for example because another script closed the popup. When we built the locker we tied the unlock to every way the popup can end, not just the signup: a successful submit, any of the popup’s own buttons, or the popup closing for any other reason. The blur never outlives the popup.
Step 2: Write the deal clearly
A gate that explains what the visitor gets converts far better than a bare form. Your heading names the thing (“Get the full 12-step checklist”), the line under it says what happens next (“Free. We will also send you one new checklist a month.”), and the button repeats the reward (“Unlock the checklist”).
Use the popup’s After Submitting setting to thank them, or to send them straight on with a follow-up message.
Step 3: Choose which pages are locked
On the Display Options tab switch Display the popup on the page to Custom Selection and include only the pages you want to gate, for example Posts: With Category → Premium, or a list under Pages: Selected. Never leave a locker on Everywhere.
Set the Trigger Events to Page Load. A delay of a few seconds, or a scroll trigger in Pro, lets the visitor read the opening first, which is when the gate makes sense.
Step 4: Do not ask subscribers twice
Someone who signed up should not hit the gate on every locked page. Under Frequency & Suppression, Once Ever is the simple choice for a locker: one signup unlocks the content for good in that browser. See popup frequency rules.
Logged-in members see the gate too. If your members should skip it, exclude them with a Pro audience rule (user roles), or keep the locked pages outside the member area.
Softer alternatives
If a full lock feels too strong, these ask for the same email more gently:
- An inline signup in the middle of the article, offering the downloadable version.
- A scroll-triggered popup at 60% of the article (Pro), when the reader has proven interest.
- A two-step opt-in button: “Get the PDF” opens the form.
Frequently asked questions
Is the content locker free?
Yes. Lock the Page Behind is available for the Form popup type in the free plugin. With Pro it also works for Yes / No question popups.
Can people get around it?
A determined visitor can read the page source, because the content stays in the page. That is deliberate: it keeps the page readable for search engines. For content that must stay private, use a membership plugin instead.
Will my bounce rate go up?
On locked pages, some visitors will leave instead of signing up. That is the trade. Lock few pages, make the offer clear, and compare signups against the traffic those pages bring.