


Subscribe form
Build a newsletter signup form, connect it to Mailchimp, choose the audience and set double opt-in and consent.
A Subscribe form collects an email address, and optionally a name, and adds the visitor to a mailing list. Mailchimp is included in the free plugin; Wing Popup Pro adds more email services.
1. Connect Mailchimp#
- In Mailchimp, create an API key: Profile → Extras → API keys → Create A Key.
- In WordPress go to Wing Popup → Forms → Integrations.
- Paste the key into Mailchimp API Key and click Save.
- Click Sync Mailchimp Audiences. Your audiences appear under Known Audiences.
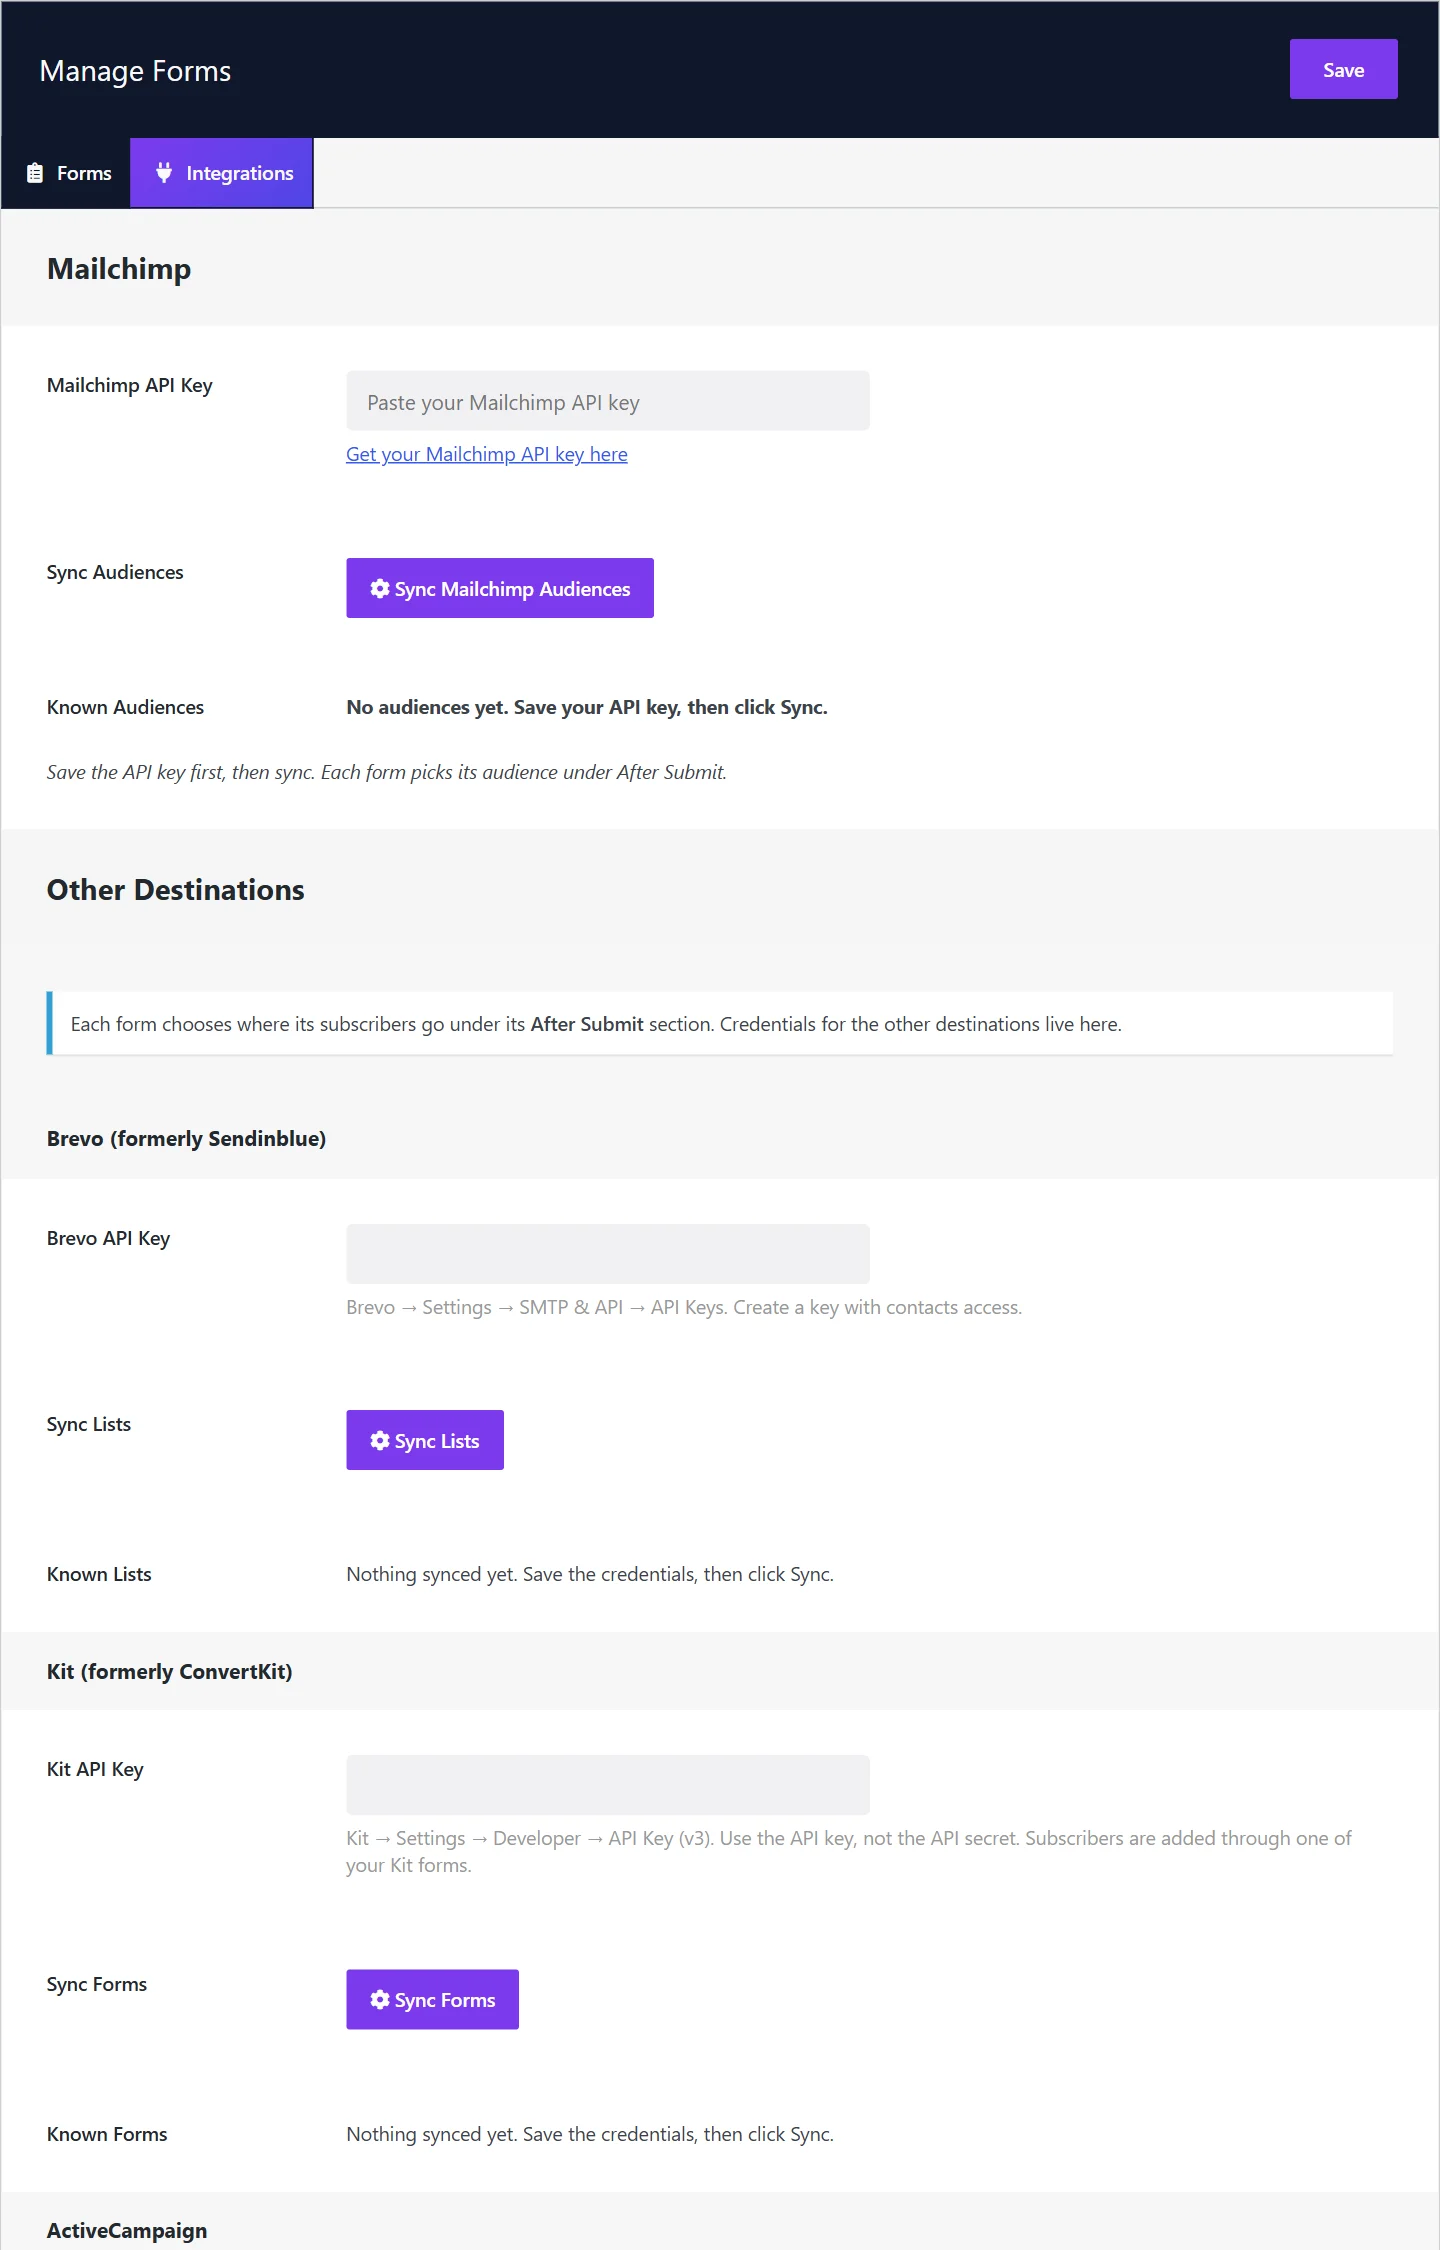
Sync again whenever you add an audience in Mailchimp.
2. Create the form#
- Go to Wing Popup → Forms and click Add New Form.
- Name the form and leave Form Type on Subscribe (newsletter).
3. Choose the fields#
On the Fields tab:
| Field | What it does |
|---|---|
| Form Fields | Tick what the form asks for: Email (always needed), First Name, Last Name, Consent Checkbox (required). |
| Consent Checkbox Text | The text beside the consent box. The signup is refused unless the box is ticked. |
| Email Label, Email Placeholder | The email field's label and the grey hint inside it. |
| First Name / Last Name Label and Placeholder | The same for the name fields. |
| Submit Button Text | Subscribe by default. |
A short form converts best. Ask for the email alone, or email and first name, unless you really use more.
4. Choose where subscribers go#
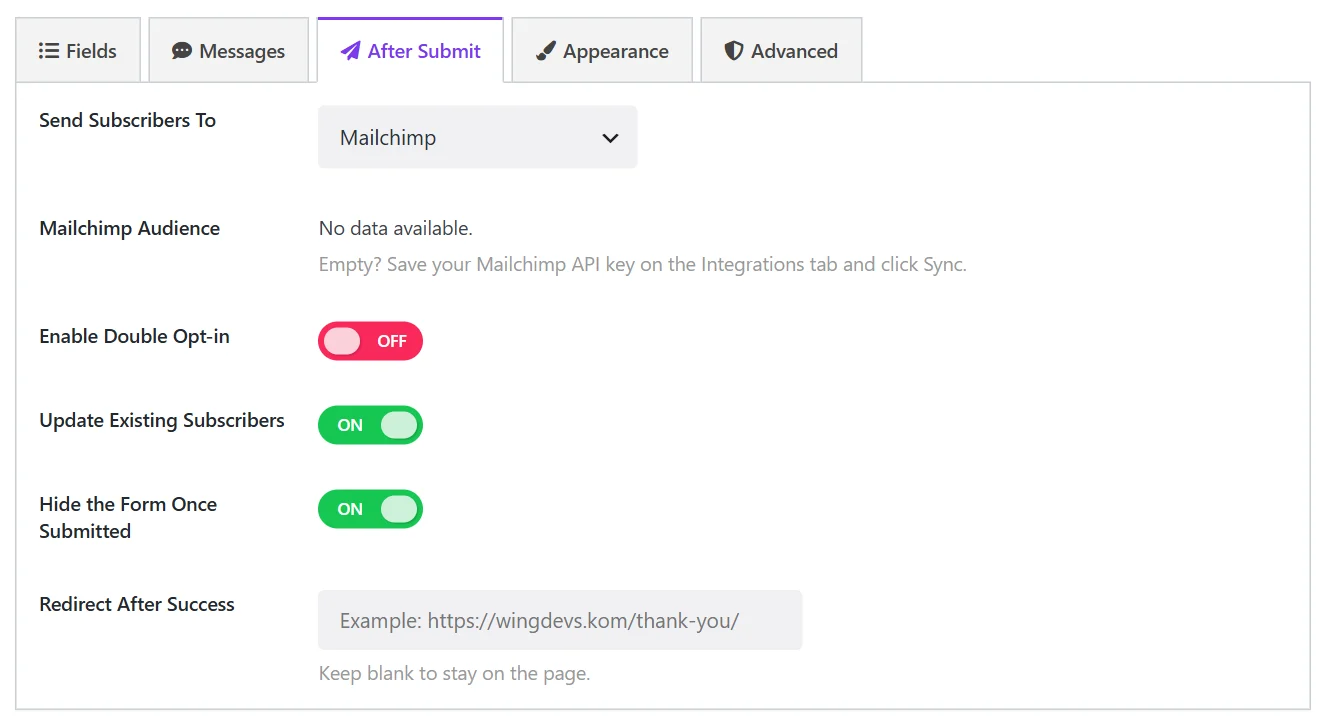
On the After Submit tab:
| Field | What it does |
|---|---|
| Send Subscribers To | The email service. Mailchimp in the free plugin. |
| Mailchimp Audience | The audience new subscribers join. Empty? Save your API key on the Integrations tab and click Sync. |
| Enable Double Opt-in | Mailchimp first sends a confirmation email; the visitor joins the audience only after clicking its link. |
| Update Existing Subscribers | When the address is already in the audience, update its details instead of reporting an error. |
| Hide the Form Once Submitted | Replaces the form with its success message. |
| Redirect After Success | Sends the visitor to a page, for example a thank-you page. Leave empty to stay on the page. |
Click Save.
5. Show the form#
Put the form in a popup with the Form popup type, or in a page with its shortcode or block.
Double opt-in and consent#
- Double opt-in proves that the address belongs to the person who typed it. It keeps your list clean and is expected in several countries, Germany among them. Switch it on unless you have a reason not to.
- The consent checkbox records an explicit agreement. Under the GDPR you need a clear statement of what the visitor signs up for; the checkbox text is the place for it, with a link to your privacy policy in the popup's content.
Messages#
The texts a visitor sees after submitting (success, failure, invalid email) are on the Messages tab. See Form messages and appearance.
Give something in return#
A signup that rewards the visitor converts far better. Use a Form popup with After Submitting → Show a follow-up message and reveal a discount code. See Follow-up message and coupon.
If signups do not arrive#
- Mailchimp Audience shows "No data available". The API key is missing or was not synced. Save the key, then click Sync Mailchimp Audiences.
- The form says it failed. The address may already be subscribed (switch on Update Existing Subscribers), or Mailchimp rejected it. Mailchimp refuses addresses that unsubscribed earlier or that it considers invalid.
- Nobody appears in the audience. With double opt-in, new contacts appear only after confirming. Check the spam folder for the confirmation email.
Did this not answer your question?
Send us what you are trying to do and we will help, and improve this page.